 how-to
How to Clean a Gun Bore at Home: Step-by-Step Guide
Table of Contents
- Essential Gun Cleaning Kit Tools You Need Before You Start
- Step-by-Step: How to Clean a Gun Bore at Home
- Choosing the Best Gun Bore Cleaning Solvent for Carbon and Copper
- Using a Bore Guide and Cleaning Rod Without Damaging Rifling
- How Often to Clean a Rifle Barrel (and When to Skip It)
- Borescope Checks, Barrel Materials, and Fixing Accuracy Loss
- Common Mistakes and Environmental Disposal After Cleaning
- Frequently Asked Questions
Last Updated: September 24, 2026
Essential Gun Cleaning Kit Tools You Need Before You Start
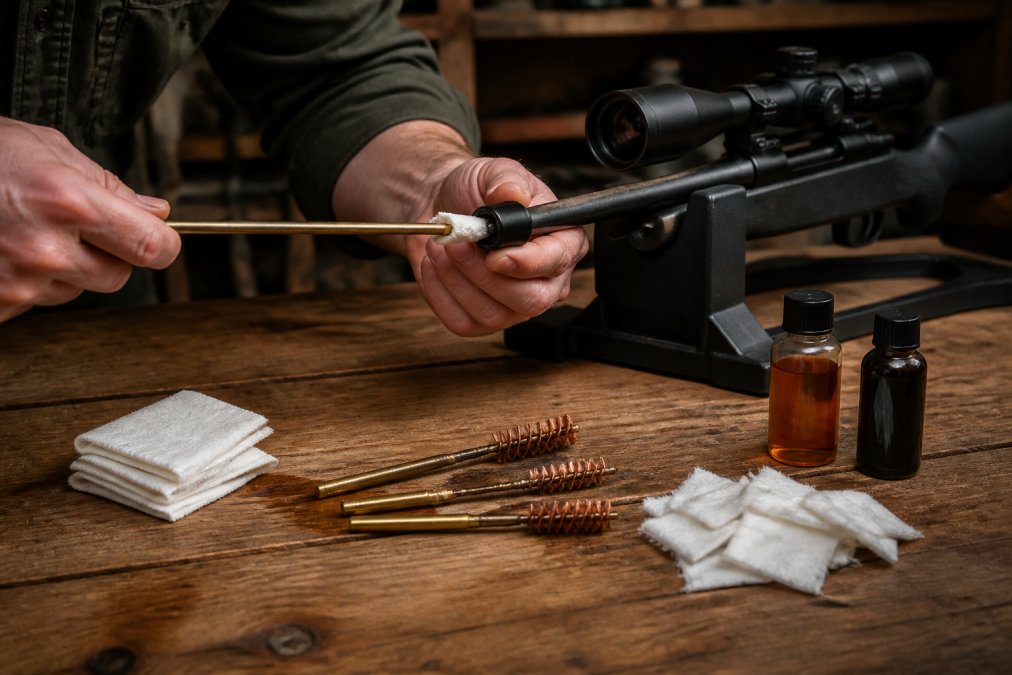
You don't need a workbench full of gear to clean gun bore at home. You need the right tools, arranged before you start, so you're not hunting for a jag while solvent dries in the barrel.
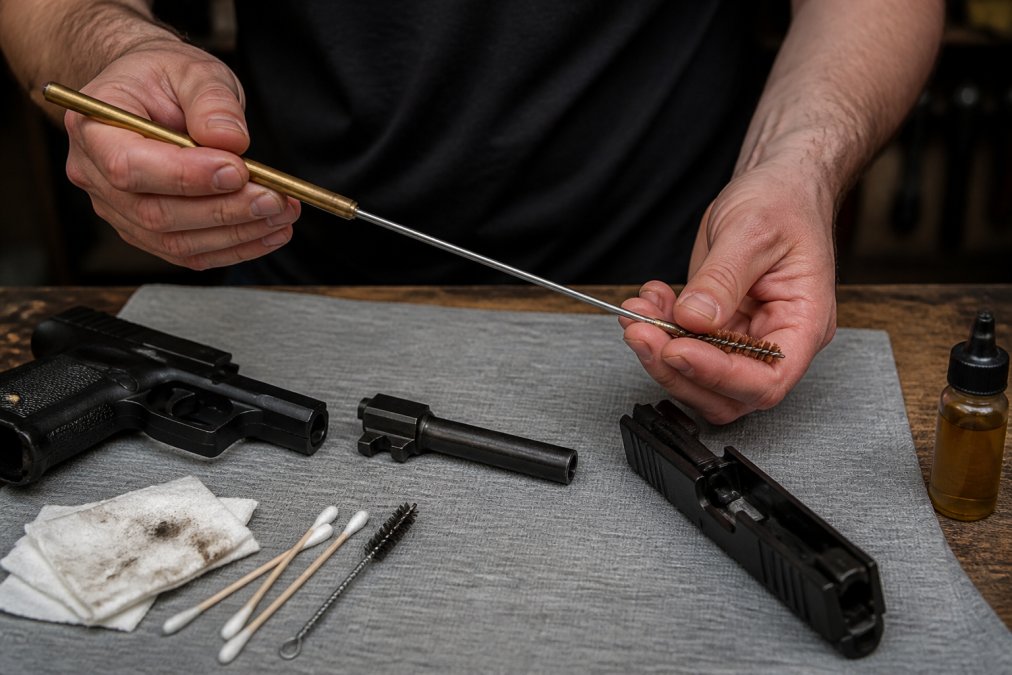
The essential gun cleaning kit tools break into four groups:
- Solvent and lubricant for breaking down carbon and copper fouling
- Cleaning rod in one piece if possible, with a bore guide to protect the throat
- Brushes (nylon and bronze) matched to your bore diameter
- Patches, jag, and patch holder for wet and dry swabbing
Add a degreaser for the action, a chamber brush, and a bore snake for quick field passes.
Cleaning is a maintenance routine, not a project.
Step-by-Step: How to Clean a Gun Bore at Home
Here's the short version: clear the firearm, wet the bore with solvent, let it soak, brush, then swab with clean patches until they come out white. That's the whole cleaning cycle.
Total Time: 20-40 minutes Difficulty: Beginner
Step 1: Clear the Action and Remove the Bolt or Slide
Open the action and confirm the chamber is empty before anything else. Remove the bolt, slide, or cylinder so you can work from the breech end.
Point the muzzle in a safe direction the entire time. This step is not optional, and skipping it is the mistake that ends range days badly.
Expected Result: An empty, open action with a clear path from breech to muzzle.
Step 2: Run a Wet Patch, Then Let the Solvent Soak
Push a solvent-soaked patch through from the breech. Then wait. Most solvents need time to soften carbon fouling and copper fouling, and a two-minute soak does more than ten dry patches.
A common mistake is rushing this. Solvent soak time is the cheapest labor you'll ever get.
Expected Result: A patch that comes out black or blue-green, depending on what fouling it lifted.
Step 3: Brush, Swab, and Repeat Until Patches Come Out Clean
Run a bronze brush through 10-15 passes, then swab with a wet patch, then a dry patch. Repeat the cycle until a dry patch comes out clean.
Then run one lightly oiled patch to leave a thin film against corrosion. Wipe the outside, reassemble, and function-check the action.
Expected Result: Clean patches, a lightly oiled bore, and a smooth-cycling action.
Choosing the Best Gun Bore Cleaning Solvent for Carbon and Copper
The best gun bore cleaning solvent depends on what's actually in your barrel, and the two main fouling types behave very differently. Carbon fouling is soft, sooty residue from burned powder and primer. It comes out with a general-purpose solvent, a bronze brush, and a little patience.
Here's how the common fouling types compare:
| Fouling Type | What It Looks Like | What Removes It | Typical Dwell Time |
|---|---|---|---|
| Carbon | Black, sooty patches | General solvent + bronze brush | 5-15 minutes |
| Copper | Blue-green patches | Ammonia-based or chelating copper solvent | 10-30 minutes, per label |
| Lead | Gray streaks, heavy buildup | Lead-specific solvent + nylon brush | 15-30 minutes |
| Mixed | Dark patches that fade slowly | Copper solvent first, then carbon solvent | Two separate cycles |
| Plastic wad residue (shotgun) | Gray film, streaks | General solvent + nylon brush | 5-10 minutes |
Solvent families and what they actually do.
- Petroleum distillate general cleaners lift loose carbon and light fouling. They're mild, cheap, and safe to leave on steel, but they will not touch bonded copper.
- Ammonia-based copper removers dissolve copper jacket fouling. They work fast, but ammonia is aggressive on some finishes and can attack a barrel if left in too long. Follow the label dwell time exactly and patch it out completely.
- Chelating (non-ammonia) copper removers bind copper molecules without the fumes. They typically need longer dwell times but are gentler on finishes and easier to use indoors.
- Lead-specific removers use a different chemistry aimed at cast and swaged lead. A nylon brush is the right pairing here; bronze bristles can smear lead rather than lift it.
A note on "miracle" all-in-one products. Some solvents claim to handle carbon, copper, lead, and plastic in one step. They can work, but they usually trade speed for convenience. If you shoot high round counts of copper-jacketed ammunition, a dedicated copper remover will still be faster in practice.
Using a Bore Guide and Cleaning Rod Without Damaging Rifling
A bore guide is a sleeve that centers the cleaning rod in the bore so the rod never touches the rifling or the throat. It is the single cheapest way to protect barrel integrity.
Pair it with these habits:
- Use a one-piece coated rod, not a jointed one that flexes
- Push patches from breech to muzzle, never the reverse
- Let the rod follow the bore; don't fight it with side pressure
- Replace worn brushes before the bristles flatten
How Often to Clean a Rifle Barrel (and When to Skip It)
How often to clean a rifle barrel depends on your ammunition, your accuracy standards, and what the target is telling you, not on a calendar. There is no universal round count, and any guide that gives you one number is guessing about your gun.
Skip the deep clean when:
- Accuracy is still tight and you're mid-match season. Many competitive shooters deliberately leave a lightly fouled bore in place because it shoots consistently.
- You just cleaned and have fired fewer than 50 rounds.
- The bore is storing a light oil film for safe storage and you're not about to shoot.
- You're shooting a rimfire that groups well and the bore looks fine on a borescope.
Clean sooner when:
- You've been shooting ammunition with known-fouling primers or soft jackets.
- The gun has been exposed to moisture, rain, or high humidity and won't be shot again soon.
- You're switching to a different ammunition type and want a known starting point.
- You see a carbon ring building at the throat on a borescope pass.
- Accuracy has already degraded and you've ruled out everything else.
Log your round count and your group sizes in the same notebook. After a few hundred rounds you'll have a personal cleaning interval that beats any generic recommendation, because it's based on your barrel and your ammunition.
Borescope Checks, Barrel Materials, and Fixing Accuracy Loss
A borescope is a camera that slides into the bore so you can actually see how clean gun bore surfaces are, along with fouling, throat wear, and rifling condition. It turns guesswork into a decision.
If accuracy drops, check in this order:
- Confirm the action screws and scope mounts are tight
- Run a borescope pass to look for copper streaks or a carbon ring
- Deep clean with the right solvent for the fouling you find
- Re-foul with a few rounds before judging accuracy
Common Mistakes and Environmental Disposal After Cleaning
The most common home cleaning mistakes are simple ones. Using a jointed rod. Skipping the bore guide. Over-oiling before storage. Running a dry bronze brush through a clean bore "just to be sure." Each one costs barrel life.
Frequently Asked Questions
What should I use to clean a gun bore at home?
You need a bore solvent matched to the fouling (carbon or copper), a cleaning rod with a jag and patch holder, nylon and bronze brushes sized to your caliber, and cotton patches. A bore guide protects the chamber and throat. Skip household items like WD-40 as a primary bore cleaner; it works as a water displacer and light lubricant, not a fouling remover. Store solvents with the caps tight and away from heat.
How often should you clean a rifle barrel to maintain accuracy?
It depends on the rifle and round count. Many precision shooters clean every 200 to 500 rounds, or when groups open up, rather than on a fixed schedule. Rimfire barrels often go much longer between cleanings. Over-cleaning a barrel that still shoots tight groups can do more harm than good. Track your round count and group sizes, and clean when accuracy drops or before long storage.
Can improper cleaning techniques damage a rifle barrel?
Yes. Running a cleaning rod from the muzzle without a bore guide lets the rod rub the crown and throat, which erodes rifling over time. Using the wrong brush, over-soaking with a harsh ammonia-based solvent, or skipping a dry patch between cycles can leave residue that attracts moisture and causes corrosion. Always clean from the breech when possible, use a bore guide, and finish with a lightly oiled patch.
What is the difference between a bore solvent and gun oil?
A bore solvent dissolves carbon, copper, and powder fouling inside the barrel. Gun oil lubricates moving parts and leaves a thin film that blocks moisture and corrosion. They are not interchangeable. Use solvent during the cleaning cycle, then run a dry patch followed by a lightly oiled patch to protect the bore. Some products combine both, but separate solvent and oil give you more control.