 how-to
How to Inspect Speedloaders for Structural Wear
Table of Contents
- Why Regular Speedloader Inspection Matters
- Visual Check: Spotting Speedloader Cracks and Damage
- Testing the Speedloader Release Mechanism Inspection
- Checking Retention and Fit With Your Revolver
- How to Clean a Revolver Speedloader and Prevent Wear
- When to Replace a Speedloader: Pass, Monitor, and Retire Criteria
- Building a Speedloader Inspection Checklist
- Frequently Asked Questions
Last Updated: October 8, 2026
Why Regular Speedloader Inspection Matters
A speedloader that fails at the range wastes time. One that fails during carry can cost you everything. Learning how to inspect speedloaders for structural wear keeps your gear reliable when it matters most.
Your speedloader is a precision tool. It takes repeated stress from loading, unloading, and storage. Polymer housing cracks. Metal components wear. Release mechanisms get sticky. Small problems become big ones fast.
A cracked loader body won't hold cartridges straight. A stuck release knob leaves you fumbling when seconds count. A bent lever strips feed lips on your magazines.
Inspection catches these issues before they cost you. This guide teaches you how to inspect speedloaders for structural wear and walks you through every check that matters.
Visual Check: Spotting Speedloader Cracks and Damage
Polymer Housing and Body Inspection
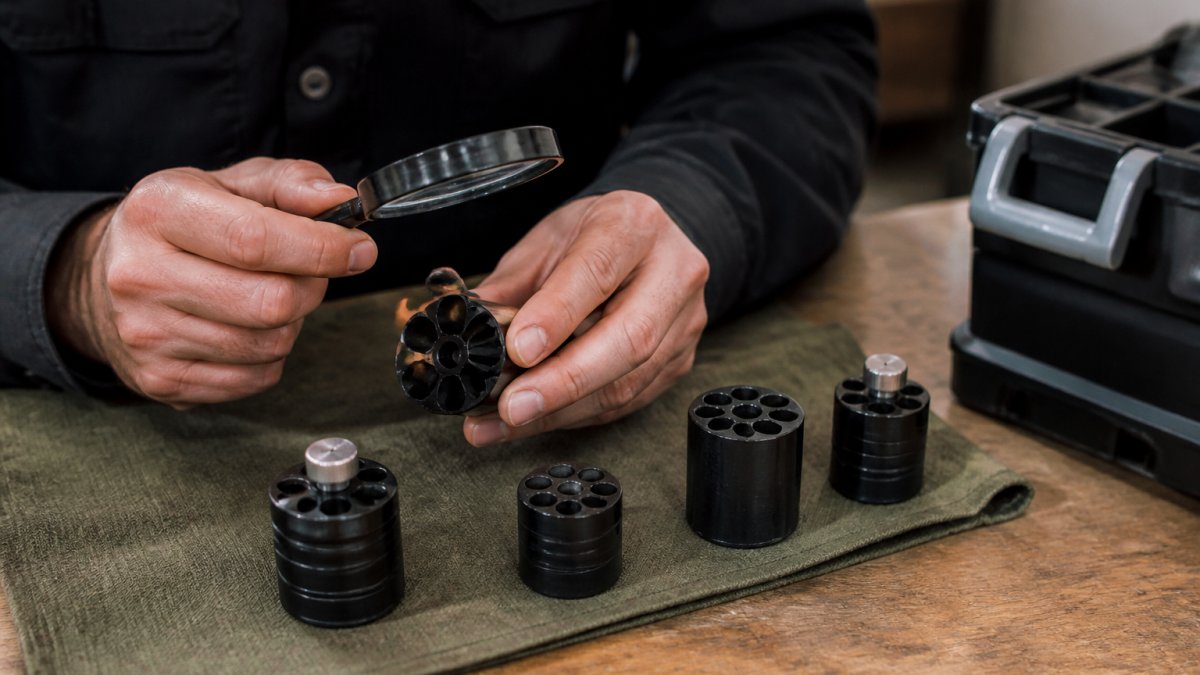
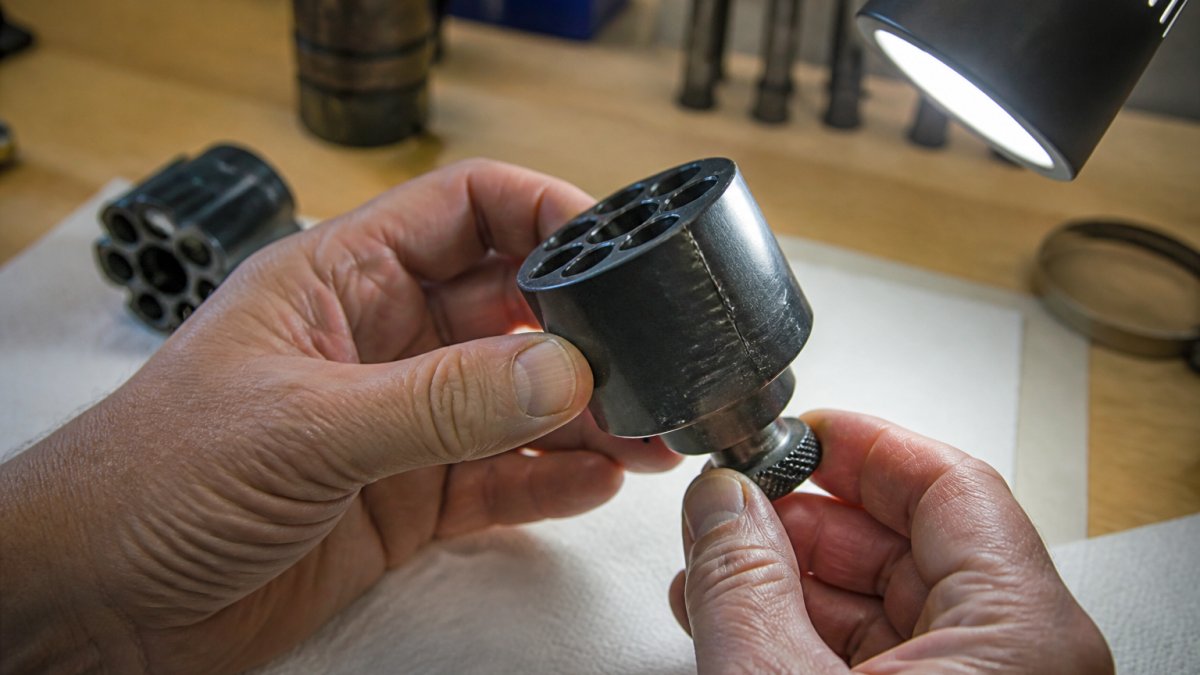
Start with what you can see. Set your speedloader under bright light. Look at the entire body from every angle.
Polymer cracks are your biggest concern. They start small and spread. A hairline crack in the loader body will grow with use. It will eventually split wide enough that cartridges fall out of alignment.
Check these specific areas:
- Top corners where the loading chamber meets the body
- Around the release knob hole (high-stress point)
- Along the edges where two pieces of polymer are joined
- The bottom where cartridges rest during loading
- Anywhere the loader has been dropped or pinched
Run your thumb over the surface. Feel for rough spots, gouges, or stress marks. Rough patches often come before visible cracks.
Look for discoloration. Fading means UV exposure. Darkening or whitening means stress or material breakdown. These are early warning signs.
Metal Components and Lever Condition
Metal parts take more abuse than polymer. Inspect your lever, springs, and any metal hardware carefully.
The lever is your working part. It compresses cartridges and controls release. Bending or twisting here ruins function.
Look for:
- Bends or twists in the lever arm
- Corrosion or rust spots (even small ones)
- Loose rivets or fasteners
- Scratches that expose bare metal underneath
- Pitting or surface damage
Bend the lever gently by hand. It should move smoothly with no grinding or catching. If it feels rough, metal particles are likely inside.
Check all fasteners. Tighten anything loose with the right tool. Loose hardware causes misalignment and cartridge binding.
Testing the Speedloader Release Mechanism Inspection
Checking Knob and Ball Bearing Function
The release knob controls everything. It must turn smoothly and hold position. Most loaders use a ball bearing or detent system.
Rotate the knob slowly. Listen and feel for grinding. Smooth rotation means the bearing is fine. Grinding or catching means wear or debris inside.
Press the knob. It should click or snap into position. Sloppy movement means the detent is worn. The loader won't hold cartridges properly during loading.
Apply light pressure outward on the knob while rotating it. It should resist slightly then move. No resistance means the spring is weak or missing.
Clean around the knob area with a dry toothbrush. Debris builds up here and causes sticking. Brush gently to avoid forcing dirt deeper.
Verifying Smooth Release and Cartridge Retention
Load your speedloader with snap caps or empty casings. Do not use live ammunition for this test.
Insert the loaded speedloader onto a revolver cylinder. It should fit snugly with no wobbling. Wiggle it gently. Excessive movement means wear.
Rotate the knob to release. Cartridges should drop smoothly into the cylinder. If they stick or bind, the loader is worn.
Try this several times. Consistency matters. One smooth release is luck. Five smooth releases in a row means the loader works.
Remove the speedloader. Check that all cartridges released cleanly. Any stuck in the loader mean the retention system is failing.
Checking Retention and Fit With Your Revolver
Cylinder Alignment and Clearance Testing
Speedloaders must match your specific revolver. Even small differences cause problems.
Load snap caps into your speedloader. Mount it on your cylinder. The cartridges should line up perfectly with the cylinder chambers.
Look from the side. The cartridges should sit centered in each chamber. Offset cartridges mean the loader body is warped or the revolver has unusual chamber spacing.
Check clearance around the grip. The loader body must not contact the grip frame. Contact means binding during loading. It also means the loader won't seat fully.
Rotate the loader gently on the cylinder. It should move smoothly without catching. Catching means the loader body or revolver has wear.
Safe Function Testing With Inert Rounds
Use only snap caps or empty casings for this test. Never use live ammunition.
Bulletproof Speed-Loader COMBAT Model →
Load ten cycles using snap caps. Load and unload completely each time. Watch for problems:
- Cartridges binding in the loader
- Slow or sticky release
- Cartridges not dropping into chambers
- Loader body shifting on the cylinder
- Knob becoming harder to turn
After ten cycles, inspect the snap caps. They should show even marks from the loader fingers. Uneven marks mean the loader is misaligned.
Check the loader body for new marks or damage. New scratches or stress marks indicate contact with the cylinder or frame.
How to Clean a Revolver Speedloader and Prevent Wear
Dirt, debris, and environmental exposure cause most speedloader failures. But not all speedloaders age the same way. A polymer-bodied loader with a metal release mechanism has two different failure timelines running at once. Cleaning and storage practices need to account for both.
Material-Specific Aging: Polymer vs. Metal
Polymer bodies and metal components respond to different stressors. Treating them the same shortens service life.
Polymer housing:
- UV exposure from sunlight breaks down polymer chains over time (Effects of Ultraviolet Radiation Exposure on Vinyl Ester Resins). A loader left on a dashboard or stored in an open range bag fades, chalks, and becomes brittle. Fading is the visible early warning; brittleness follows.
- Solvents, including some gun-cleaning sprays and aerosol lubricants, can soften or craze polymer. If a solvent label says "not for use on plastics," keep it away from the loader body.
- Moisture absorption causes some polymers to swell slightly, which changes cartridge alignment and retention. This is why liquid cleaners are a poor choice on polymer loaders.
- Heat accelerates all of the above. A closed vehicle in summer can exceed 140°F inside, which is enough to warp thin polymer sections over repeated exposure.
Metal components (lever, springs, fasteners):
- Moisture and sweat cause surface rust. Surface rust is cosmetic; pitting is structural. Pitting creates stress risers where cracks begin.
- Solvent residue left on springs can attract grit, which accelerates wear at contact points.
- A light film of gun oil on metal parts is protective. Pooled oil is not, it traps debris and can migrate into the release mechanism.
A common pattern is a loader that looks fine but has a brittle polymer body and a slightly pitted spring. The body fails first because brittleness is invisible until it cracks.
Step-by-Step Cleaning Procedure
- Disassemble only what the manufacturer allows. Most speedloaders are not designed for full disassembly. Forcing apart a pressed or riveted body destroys it.
- Dry-brush the release knob area. Use a dry toothbrush with soft bristles. Debris accumulates in the detent or ball-bearing channel and causes sticking. Brush in one direction, then the other. Do not force bristles into tight gaps, you will push debris deeper.
- Blow out the cartridge chamber area with compressed air. Hold the can upright to avoid propellant spray. Dirt hides in the grooves where cartridge rims seat.
- Wipe the polymer body with a clean, dry microfiber cloth. Do not use paper towels, they leave lint that migrates into the mechanism.
- Apply a light gun oil to metal components only. Put a drop on a cloth, wipe the lever and fasteners, then wipe off excess. Do not let oil pool or drip into the polymer body.
- Inspect after cleaning, not before. Cleaning reveals cracks and stress marks that dirt was hiding.
Storage and Environmental Protection
- Store in a dry location. Moisture causes corrosion on metal and swelling in some polymers.
- Keep out of direct sunlight. UV exposure weakens polymer over time, and the damage is cumulative.
- Avoid extreme heat. Do not leave loaders in a closed vehicle or in direct sun on a range bench.
- Use a dedicated pouch or slot in your range bag. Contact with other gear causes scratches that become stress points.
- Store loaded or empty? Both work. Some shooters prefer unloaded to reduce spring compression over long storage. The difference is minimal if you inspect regularly, but for loaders stored for months at a time, unloading is the more conservative choice.
Inspection Frequency and Maintenance Record
Inspection frequency should match how the loader is used, not a calendar.
- Before every range trip: Two-minute visual and function check.
- Before every carry day: Same check, plus a retention test with snap caps.
- After any drop, impact, or rough handling: Full inspection, regardless of schedule.
- After extended storage (three months or more): Full inspection before returning to service.
- Weekly for daily-carry loaders: Carry gear takes more stress than range gear.
- Monthly for regular range use; quarterly for occasional use.
Log your inspections. Write the date and condition. Track changes over time. A loader that is fine one month but cracked the next needs replacement. A loader with the same stable hairline crack for three months is a monitor item, not a retire item.
Example log entries:
- October 1: Clean, no issues
- October 8: Light scratches on body, knob smooth
- October 15: Hairline crack forming near release knob, monitor
Records show trends. A new crack every week is a failing loader. The same crack for three months is stable.
When to Replace a Speedloader: Pass, Monitor, and Retire Criteria
Specific Wear Points and Failure Indicators
Know what you're looking for. Some wear is normal. Some wear means retirement.
Pass, Keep Using:
- Light surface scratches on polymer
- Minor scuffs on the lever
- Slight discoloration from UV exposure
- Smooth operation with no grinding
Monitor, Inspect More Often:
- Hairline cracks in polymer (less than 1 inch long)
- Slight corrosion on metal (surface only, no pitting)
- Occasional sticking in the release knob
- Loose fasteners (tighten and recheck weekly)
- Small gouges that don't affect function
Retire, Replace Immediately:
- Large cracks in polymer (1 inch or longer)
- Cracks that grow between inspections
- Bent or twisted lever that won't straighten
- Release knob that grinds or won't turn smoothly
- Cartridges that stick or bind during loading
- Visible rust or deep pitting on metal
- Fasteners that loosen repeatedly
- Loader that no longer fits your revolver properly
Inspection Frequency and Maintenance Records
Inspect before every range trip. This takes two minutes. It catches problems early.
Log your inspections. Write the date and condition. Track any changes over time. A loader that's fine one month but cracked the next needs replacement.
For daily carry, inspect weekly. Carry gear takes more stress than range gear. Weekly checks catch wear fast.
For range-only loaders, inspect monthly if you shoot regularly. Quarterly if you shoot occasionally.
Keep records in a simple notebook or phone note. Write the date and what you found. Example:
- October 1: Clean, no issues
- October 8: Light scratches on body, knob smooth
- October 15: Hairline crack forming near release knob, monitor
Records show trends. A loader with a new crack every week is failing. One with the same crack for three months is stable.
Building a Speedloader Inspection Checklist
Use this checklist every time you inspect. Print it or save it on your phone.
| Inspection Point | What to Check | Pass | Monitor | Retire |
|---|---|---|---|---|
| Polymer body | Cracks, gouges, discoloration | No cracks | Hairline cracks <1" | Cracks >1" or growing |
| Metal lever | Bends, corrosion, grinding | Straight, smooth | Surface corrosion only | Bent, won't straighten |
| Release knob | Smooth rotation, detent click | Smooth, clicks | Occasional stick | Grinds, won't turn |
| Fasteners | Loose or missing | All tight | Loosen occasionally | Won't stay tight |
| Cartridge fit | Alignment, binding | Perfect fit | Slight offset | Won't seat properly |
| Function test | Load/unload 5 cycles | All smooth | One rough cycle | Multiple failures |
Do this before every range trip. Do this before every carry day. Do this after any drop or impact.
Regular inspection is the difference between a loader you trust and one that fails when you need it. Structural wear sneaks up slowly. Catch it early and your speedloader stays reliable for years.
The Bulletproof Speed-Loader COMBAT Model and TACTICAL Model are built for durability, but even the best gear needs regular checks. Both feature durable polymer bodies and smooth release mechanisms designed to handle repeated use. Follow this inspection routine, keep records, and replace your loader when it hits the retire criteria. Your gear will perform when it matters.

Frequently Asked Questions
How do you inspect a speedloader for cracks or structural damage?
Start with a visual inspection under bright light. Look for cracks in the polymer housing, especially around the loader body and release mechanism. Check metal components like the lever and catch for bending, corrosion, or loose fasteners. Run your finger along seams and edges to feel for sharp breaks. Test the release knob and ball bearing for smooth operation. If you find any cracks, loose parts, or binding, the speedloader should be retired from use to prevent cartridge jams or uneven loading.
What parts of a speedloader wear out first?
The release mechanism, especially the knob, ball bearing, and lever, experiences the most wear from repeated use. The polymer housing around stress points, like where the catch engages the cylinder, develops cracks over time. Metal components can corrode if exposed to moisture or stored improperly. The feed lips area where cartridges are retained also degrades with heavy use. Regular inspection of these wear points before each range session catches problems early.
When should you replace a damaged speedloader?
Replace your speedloader immediately if you find structural cracks, missing or loose parts, a stuck or grinding release mechanism, or cartridge retention problems. If the loader binds when loading rounds or fails to release them evenly, it's time for a replacement. Minor cosmetic wear doesn't affect function, but any damage that impacts loading reliability or safety means retiring the unit. The Bulletproof Speed Loader COMBAT Model ($69.95) and TACTICAL Model ($89.95) are reliable replacements that hold up to regular use.
How can you safely test a speedloader without firing rounds?
Use snap caps or empty casings to test function. Load the speedloader with inert rounds and practice the loading motion with your revolver cylinder. Check that cartridges seat properly, the release mechanism operates smoothly, and all rounds drop evenly. This dry-fire practice reveals binding, misalignment, or retention issues without risk. Store snap caps separately from live ammunition to avoid confusion, and always confirm your revolver is unloaded before any testing.