 ultimate-guide
Essential Dry Fire Practice Routines for Permit Holders
Table of Contents
- Why Dry Fire Practice Matters for Concealed Carry Permit Holders
- Dry Fire Safety Protocols: Non-Negotiable Rules for Every Session
- Core Dry Fire Practice Routines: 5 Drills That Build Real Skill
- Drill 1: Trigger Press and Sight Alignment
- Drill 2: Holster Draw and First-Shot Break
- Drill 3: Magazine Reload and Target Transition
- Drill 4: Grip Pressure and Recoil Anticipation
- Drill 5: Follow-Through and Reset
- Tailoring the Five Drills to Your Carry Position
- A Note on Dry Fire and the Draw From Concealment
- Building a Dry Fire Training Schedule That Sticks
- Best Dry Fire Training Tools for Permit Holders
- Tracking Progress and Fixing Common Accuracy Errors
- Frequently Asked Questions
Last Updated: September 16, 2026
Why Dry Fire Practice Matters for Concealed Carry Permit Holders
Dry fire practice is training with an unloaded firearm to build trigger control, draw speed, and reload efficiency without live ammunition. At BULLETPROOF SPEED LOADERS, we hear the same thing from permit holders: range time is expensive, scarce, and rarely frequent enough to build real muscle memory. That is the gap essential dry fire practice routines close.
Dry Fire Safety Protocols: Non-Negotiable Rules for Every Session
Dry fire safety protocols exist because a firearm you have "checked twice" is still a firearm. Treat every session with live-firing-line discipline until these habits are automatic.
- Clear the weapon completely. Remove the magazine, lock the slide back, and visually and physically confirm the chamber is empty, every time you pick the gun up, even mid-session.
- Remove all live ammo from the room. Not the drawer, not the range bag in the corner. A separate room entirely.
- Designate a safe backstop. Point the muzzle only at a wall that will stop a round if your routine fails, brick or concrete beats a bedroom closet.
- No distractions. No phone, no television, no children or pets moving through the training area.
The Four-Point Pre-Session Safety Check
Run this check before every session, in this order:
- Magazine removed and set aside
- Chamber visually and physically confirmed empty
- Live ammo stored in a different room
- Muzzle pointed at your designated backstop
Core Dry Fire Practice Routines: 5 Drills That Build Real Skill
The best dry fire practice routines isolate one skill at a time, then combine them. Run the drills below in order, adding repetitions only once the mechanics feel consistent.
Drill 1: Trigger Press and Sight Alignment
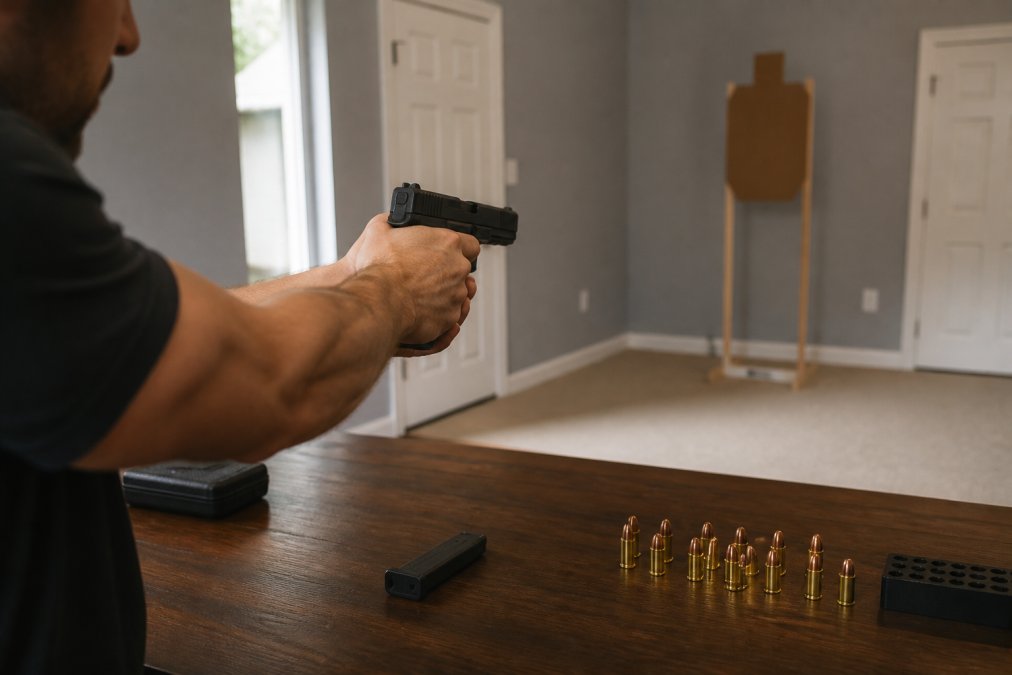
The goal is a clean trigger press that does not disturb your sight picture. Align your sights on a small wall target, press the trigger straight back without moving the front sight, and repeat slowly before adding speed.
Drill 2: Holster Draw and First-Shot Break
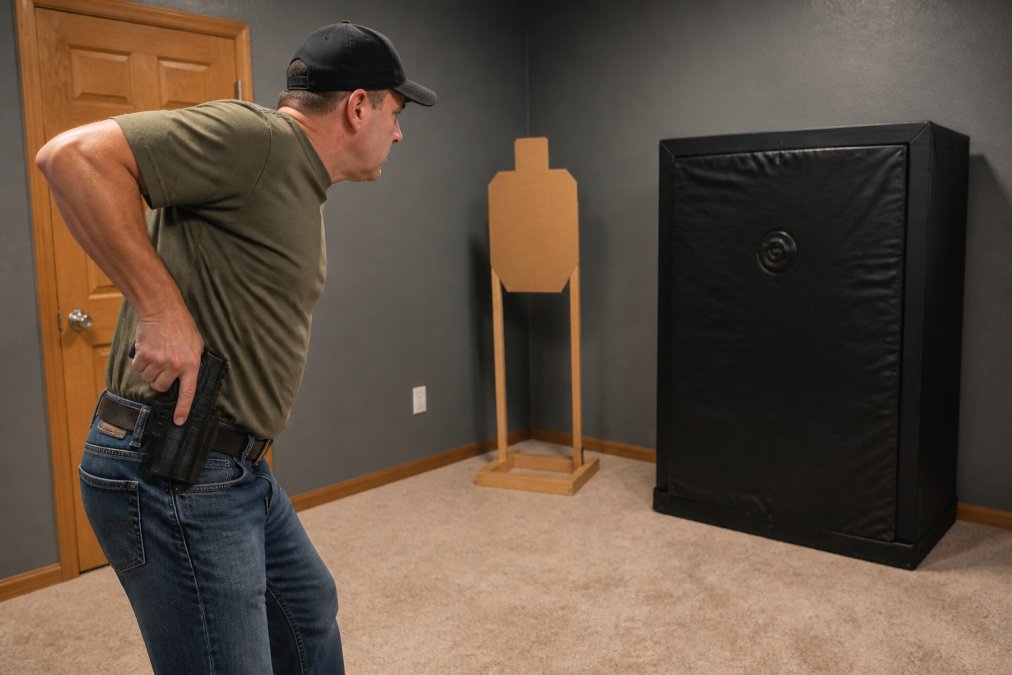
From a concealed carry position, practice your draw stroke until your support hand meets your grip and your sights land on target in one motion. Break the shot the instant your sight picture settles, the sequence that matters most in a defensive encounter.
Drill 3: Magazine Reload and Target Transition
Pair a magazine change with a target transition: drop the empty magazine, insert a fresh one, and move your sights to a second target. Fumble time is where most shooters lose seconds, which is why a reliable speed loader for your practice mags keeps reps flowing.

Drill 4: Grip Pressure and Recoil Anticipation
Press your grip firmly into the frame and dry fire ten slow repetitions. If your muzzle dips when the hammer or striker falls, you are anticipating recoil. Flinch shows up in dry fire practice long before it shows up on paper.
Drill 5: Follow-Through and Reset
Hold the trigger to the rear after the break, then release only to the reset point. This builds the follow-through that keeps your second shot accurate.
Tailoring the Five Drills to Your Carry Position
Most guides hand you one generic set of drills and stop there. But your draw stroke should match the holster you actually wear, because the concealment garment, grip angle, and clearing motion differ for each setup. Run the same five drills, then adjust them to your position.
A Note on Dry Fire and the Draw From Concealment
When you rehearse the draw from concealment, wear the same cover garment you wear day to day. A t-shirt behaves differently from a jacket, and a holster that sits differently when seated changes your clearance motion. Rehearse the draw the way you will actually need it.
Building a Dry Fire Training Schedule That Sticks
A dry fire training schedule works when it is small enough to survive a busy week. Ten focused minutes, five days a week, beats an hour-long session you skip twice a month.
Bulletproof EZ-MAG Pistol Speed Loader →
Here is a simple weekly structure to start with:
| Day | Focus | Duration | Repetitions |
|---|---|---|---|
| Monday | Trigger press and sight alignment | 10 min | 50 presses |
| Tuesday | Holster draw and first shot | 10 min | 30 draws |
| Wednesday | Reload and target transition | 10 min | 25 reloads |
| Thursday | Grip pressure and recoil anticipation | 10 min | 40 presses |
| Friday | Follow-through and reset | 10 min | 40 presses |
Best Dry Fire Training Tools for Permit Holders
The best dry fire training tools remove friction from your reps. Snap caps protect your firing pin, a shot timer or phone app gives you par and split times, and laser training systems show where the muzzle was pointing at the break.
Speed Loaders and Magazines: Reducing Fumble Time
The Bulletproof EZ-MAG Pistol Speed Loader completes a magazine in two steps: insert the magazine into the loader, then feed and push. It fits Glock 17, 18, 19, 22, 23, 24, 26, 27, 34, 35, 45, and 47 models in 9mm.40 S&W, and some .380, along with magazines from Sig, Springfield, Ruger, CZ, and Beretta.
Tracking Progress and Fixing Common Accuracy Errors
Progress tracking turns dry fire practice from a habit into a measurable skill, but most guides say "log your sessions" without explaining what to write down or how to read the numbers. Here is a concrete system you can start tonight.
The Four Numbers to Log Every Session
Log these four values after each drill block, one line per drill.
- Par time. The target time you set for completing one repetition, measured with a shot timer or a phone app. Record the par time you used, not just whether you beat it.
- Hit rate. For drills with a defined target, the number of clean repetitions out of the total attempted. A clean rep means the sights did not move off the aiming point through the entire trigger press.
- Split time. The time between the first and second shot in a two-shot string. This is where follow-through and reset show up as a number.
- Error note. One short phrase describing what went wrong on the worst rep, such as "front sight dipped," "grip slipped," or "rushed the draw."
A Simple Session Log Template
Use a table like this in a notebook or spreadsheet. One row per drill, one column per metric.
| Date | Drill | Par Time | Reps | Clean Reps | Hit Rate | Split Time | Error Note |
|---|---|---|---|---|---|---|---|
| 9/16 | Trigger press | 1.5 s | 50 | 44 | 88% | , | Front sight drifted low-left |
| 9/16 | Holster draw | 1.8 s | 30 | 24 | 80% | 0.9 s | Rushed first grip |
| 9/16 | Reload | 2.5 s | 25 | 21 | 84% | , | Fumbled mag seat |
How to Read the Numbers
A single session tells you almost nothing. The pattern across two to four weeks is what matters.
- Par time dropping while hit rate holds steady means you are getting faster without getting sloppy. Keep pushing the par time down in small increments.
- Par time dropping while hit rate falls means you are trading accuracy for speed. Back the par time up until hit rate recovers, then advance again.
- Hit rate flat for two weeks usually means the drill is too easy or too hard. Adjust the target size or the par time rather than adding reps.
- Split time creeping up points to a follow-through or reset problem, not a speed problem. Go back to the follow-through drill and slow down.
Fixing Common Accuracy Errors
Common accuracy errors show up predictably, and each maps to a correction you can rehearse in dry fire.
- Low-left group (right-handed shooter). Usually a grip that tightens as the trigger breaks, or too much trigger finger on the trigger. Correction: press the trigger with the pad of the finger, not the crease of the joint, and keep grip pressure constant through the press.
- Vertical stringing. Inconsistent sight alignment, often from the eye moving between the rear notch and the front post. Correction: focus hard on the front sight and let the rear notch blur slightly.
- Muzzle dip at the break. Recoil anticipation. Correction: mix in snap cap reps and call out the sight picture out loud before each break.
- Shots drifting right (right-handed shooter). Often too little trigger finger, pushing the muzzle right as the trigger breaks. Correction: increase finger contact slightly and press straight back.
- First shot off target after the draw. The draw finishes before the sights settle. Correction: slow the last inch of the press-out and break only when the sight picture is confirmed.
Frequently Asked Questions
How often should I do dry fire practice routines?
Most instructors recommend 10 to 15 minutes of dry fire practice four to five days per week. Consistency beats marathon sessions. A short daily routine builds muscle memory faster than one long weekly session. Start with a dry fire training schedule that fits your week, then increase frequency as the movements become automatic. Even five focused minutes a day produces noticeable improvement in trigger press and sight alignment within a month.
Can dry fire practice damage my firearm?
Modern centerfire pistols are generally safe to dry fire, but repeated hammer or striker falls on an empty chamber can eventually wear internal components. Using snap caps absorbs the impact and protects the firing pin. Check your owner's manual for model-specific guidance. If you practice thousands of repetitions, snap caps are cheap insurance. Rimfire firearms should always use snap caps because dry firing on an empty chamber can peen the chamber edge.
What are the best dry fire training tools for a concealed carry setup?
For concealed carry, the best dry fire training tools include a quality holster matching your carry position, snap caps for safe trigger press, a shot timer or par time app, and a speed loader to keep spare magazines ready. The Bulletproof EZ-MAG Pistol Speed Loader ($34.95) fits Glock 17, 18, 19, 22, 23, 24, 26, 27, 34, 35, 45, and 47 models in 9mm, .40 S&W, and some .380, along with magazines from Sig, Springfield, Ruger, CZ, and Beretta, and reduces thumb fatigue during high-volume reload drills. A dedicated training mag separate from your carry ammo also helps prevent mix-ups.
How do I set up a safe dry fire practice space at home?
Choose a room with a solid backstop, like a basement wall or a designated safe direction. Remove all live ammunition from the area and store it in a separate room. Use a visual barrel block or clearing barrel if possible. Follow dry fire safety protocols: clear the weapon, check the chamber, verify no magazine is inserted, and announce 'dry fire' before starting. Never practice in a room where loaded firearms are stored.