 how-to
7 Steps to Improve Trigger Finger Stamina Safely
Quick Summary
Improve trigger finger stamina by warming up before every session, doing gentle tendon glides and isolated finger exercises, and progressing slowly one variable at a time. Track comfortable repetitions and next-day symptoms, and stop immediately if you feel locking or pain.
- Warm up with gentle finger extension, a slow fist, and light tendon glides before every session.
- Start with 2 to 3 sets per finger, 8 to 10 slow repetitions per set, resting 30 to 60 seconds between sets.
- Add only one of repetitions, sets, or resistance at a time, and only after two easy sessions in a row.
- Hold or step back a week if next-day stiffness or soreness lasts more than a day.
- Stop training for locking, catching that does not clear, sharp pain, or numbness, and seek medical advice.
Table of Contents
- Trigger Finger Stamina: Clarifying What You Are Training
- Warm-Up Before Every Session
- Trigger Finger Exercises That Build Endurance
- Pistol Trigger Control Drills for Lighter Effort
- Building a Progressive Four-Week Stamina Plan
- Managing Trigger Finger Fatigue From Shooting
- Stop Rules, Warning Signs, and When to See a Doctor
- Your Next Range Session: Setting Up Your Loadout and Log
- Frequently Asked Questions
Trigger Finger Stamina: Clarifying What You Are Training
Last Updated: October 31, 2026
Before you start any plan to improve trigger finger stamina, you need to know which "trigger finger" you mean. For shooters, the term usually means endurance and control of the index finger during repeated trigger pulls.
At BULLETPROOF SPEED LOADERS, we focus on the shooting side: reloading speed, fatigue, and efficient gear use at the range. This guide covers that side, along with the safety limits that apply if you have symptoms.
Medical trigger finger versus shooting endurance
Medical trigger finger involves pain, clicking, or locking when a finger bends or straightens. A clinical review describes two broad management approaches for it: nonsurgical care, including steroid injection and splinting, and surgical intervention (StatPearls review of trigger finger management).
Shooting endurance is different. It is about how long your hand can perform repeated, controlled trigger work before grip and finger fatigue affect accuracy. The steps below target this second goal, with a clear stop rule if symptoms appear.
Warm-Up Before Every Session
A short warm-up prepares your fingers before you handle a pistol or a magazine. Start with gentle finger extension and a slow fist, then open your hand fully. Repeat five times.
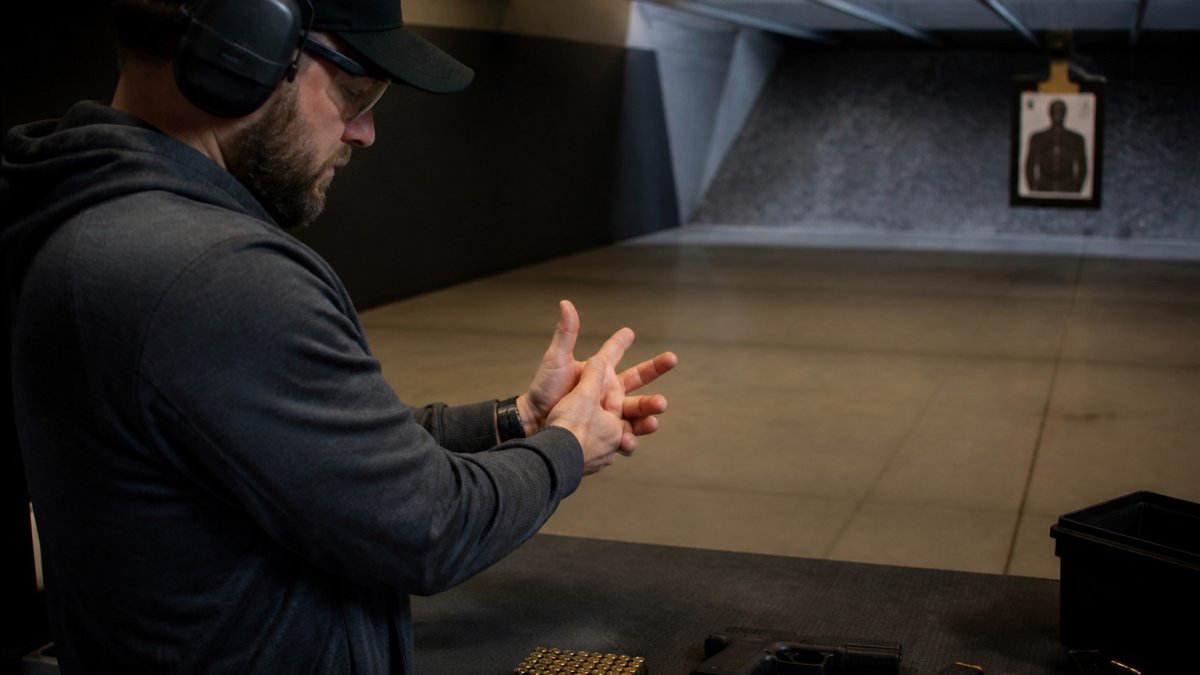
Next, do light tendon glides. Move your fingers through a hook fist, a flat hand, and a full fist, pausing briefly at each position. Keep your wrist relaxed.
Warm-up is also when you check for early warning signs. If a finger feels stiff, catches, or hurts, stop and skip live work that day.
Trigger Finger Exercises That Build Endurance
Exercises for trigger finger stamina work best when they are gentle, repeated often, and progressed in small steps. Heavy, painful pushing tends to backfire. Gentle stretching helps maintain finger mobility, and treatment guidance advises rest from repetitive gripping while symptoms are present (Mayo Clinic guidance on trigger finger treatment).
The goal is not to make your finger sore. A focused grip strength article goes deeper on strength work if you want to build finger and hand strength further.
Start with a baseline you can repeat
Before your first real session, find your comfortable starting point for each movement. Pick one exercise, such as slow finger extensions against light resistance from your other hand, and do repetitions at a steady pace until you feel the first hint of fatigue, not pain. Write down that number.
A common pattern is to begin with 2 to 3 sets per finger, 8 to 10 slow repetitions per set, resting 30 to 60 seconds between sets. Keep every repetition smooth. If a repetition causes sharp pain, locking, or a catch that does not clear, stop the set and end the exercise for the day.
Tendon glide and gentle stretching
Tendon glide exercises help the flexor tendons move smoothly through their sheaths. Cycle through straight fingers, hook fist, full fist, and a gentle stretch back to straight. Hold the stretch for two seconds at each position.
A short, low-effort routine of about 5 minutes, performed once or twice a day, is a reasonable place to start. Consistency matters more than intensity. A useful progression is to add one more cycle through the glide sequence only after you can complete the current routine for several sessions in a row without next-day stiffness.
Thumb and individual finger work
Thumb and finger isolation helps reduce the habit of gripping with the whole hand. Gently press the thumb to each fingertip in turn, then open each finger individually against light resistance from the other hand. Keep the movements slow and controlled.
How to progress without guessing
Use three levers, and change only one at a time:
- Repetitions: add 1 to 2 repetitions per set once the current count feels easy for two sessions in a row.
- Sets: add a third set only after your repetitions are steady at the current level.
- Resistance or hold time: increase light resistance slightly, or add one second to a hold, only after sets and repetitions are comfortable.
Do not add repetitions, sets, and resistance in the same week. If next-day stiffness or soreness lasts more than a day, drop back to the previous level for a week before trying again.
Technique checkpoints
Keep your wrist relaxed and your hand in a neutral position. Move only the finger you are training when the exercise calls for isolation. If your whole hand grips or your wrist bends to complete a repetition, reduce the resistance or the range of motion until the target finger does the work.
Pistol Trigger Control Drills for Lighter Effort
Trigger control reduces wasted effort. Many shooters pull with the whole hand, which tires the grip quickly. Focus on moving only the index finger, keeping the pad on the trigger and the rest of the hand steady.
Try these drills during dry fire, with an unloaded firearm and a verified safe backstop:
- Press the trigger slowly until the shot breaks, holding sight alignment for three seconds
- Reset the trigger fully before each new press
- Count repetitions in sets of 10, then rest
These drills build control without heavy repetition on live rounds. They also show how much effort your trigger pull actually needs.
Trigger control drills reduce wasted effort, and the article lists these dry-fire drills with their set structure.
| Drill | How to do it | Structure |
|---|---|---|
| Slow press | Press until the shot breaks, holding sight alignment | Hold for three seconds |
| Full reset | Reset the trigger fully before each new press | Before each press |
| Counted repetitions | Count dry-fire repetitions | Sets of 10, then rest |
Building a Progressive Four-Week Stamina Plan
A measured plan works better than guessing. Increase load slowly, change one variable at a time, and track how your finger feels the next day. The four weeks below are a template, not a race. If a week feels like too much, repeat it before moving on.
What to track each session
Keep a simple log with five entries:
- Comfortable repetitions completed per exercise
- Time to first fatigue in dry-fire or live-fire work
- Pain rating before and after the session, using a simple 0 to 10 scale
- Stiffness or locking the next morning
- Recovery time between sessions
These measures tell you whether stamina is improving. A rising comfortable repetition count, a longer time to fatigue, and stable next-day symptoms mean the plan is working. A falling count or rising next-day stiffness means hold the current week or step back.
The four-week template
- Week 1, Baseline and gentle work. Warm-up plus 2 sets of gentle exercises, daily. Record your comfortable repetitions for each movement. No live-fire grip work beyond your normal range sessions.
- Week 2, Add control work. Keep the exercise dose steady, and add one dry-fire control session of 10 minutes, three days a week. Count repetitions in sets of 10 and note when fatigue first appears.
- Week 3, Extend duration, not intensity. Extend dry-fire sessions to 15 minutes, with more reset practice. Keep exercise sets and repetitions the same as Week 2.
- Week 4, Reassess and add load carefully. Review your log. If comfortable repetitions are up, time to fatigue is longer, and next-day symptoms are stable, add one additional short range session with reduced round counts. If not, repeat Week 3.
Rules for holding or progressing
- Progress only when the current week feels easy for two sessions in a row and next-day symptoms are stable.
- Hold a week if next-day stiffness or soreness lasts more than a day.
- Step back one week if pain rises during sessions, locking appears, or recovery between sessions lengthens.
- Never add exercise volume and dry-fire volume in the same week.
Write down your session length, rounds fired, and any discomfort. This log tells you when to hold a week and when to progress, and it gives you something concrete to show a clinician if symptoms persist.
Managing Trigger Finger Fatigue From Shooting
Fatigue from shooting is often a load problem, not a strength problem. Long sessions with tight grips, repeated gripping, and heavy magazine loading can overwork the flexor tendons. Reduce gripping force, take breaks during long sessions, and avoid rapid repeated loading when your hand feels tired.
Gear helps too. Speed loaders are designed to reduce the force needed for loading, which can lower grip effort per magazine.
Stop Rules, Warning Signs, and When to See a Doctor
Stop training immediately if you notice any of the following:
- Locking, catching, or clicking that does not clear
- Sharp or worsening pain in the finger, palm, or wrist
- Numbness, swelling, or reduced movement
- Symptoms that continue for more than a few days after rest
Treat these as signals to rest and seek medical advice. A clinician can assess whether splinting, injection, or other care fits your situation. Do not push through symptoms to keep your training schedule.
Watch out: pushing through locking or pain to finish a range session can turn a manageable irritation into a condition that needs medical treatment.
Your Next Range Session: Setting Up Your Loadout and Log
Before your next session, set up your range bag with a clear plan. Pack your pistol, magazines, and a speed loader suited to your magazine size.
Then log your work. Note your warm-up, exercise sets, dry-fire time, rounds fired, and how your finger felt afterward. Review the log each week before you progress the plan.
Improving trigger finger stamina is steady work. Start light, track your progress, and respect the stop rules. Your hand will thank you on the range and off it.
Frequently Asked Questions
What can you do to improve a trigger finger?
Rest from repetitive gripping, use gentle stretching to maintain finger mobility, and reduce the load on the finger while symptoms persist. Mayo Clinic advises avoiding repetitive gripping and repeated grasping until symptoms improve and notes that gentle stretching can help maintain mobility. If locking or pain persists, a clinician can evaluate whether further treatment is needed.
How often should you train your trigger finger?
Keep sessions short and stop before the finger feels fatigued, sharp, or locked. A reasonable starting point is two to three short sessions per week, with a rest day between harder efforts, then increase volume only when the finger feels no worse the next morning. Pain that lingers into the next day is a sign to reduce load. Consistency with light work usually beats occasional hard sessions that cause flare-ups.
What should you avoid if your trigger finger hurts or locks?
Avoid repetitive gripping, repeated grasping, and prolonged use of vibrating hand-held tools, as recommended by Mayo Clinic for symptomatic trigger finger. Do not force the finger straight when it catches, and do not push through pain for range practice. Reduce dry-fire and live-fire volume until symptoms settle, and seek medical evaluation if locking persists.
How do you improve trigger speed without sacrificing control?
Build control first at a slow, deliberate pace, focusing on a smooth press with the pad of the index finger and a stable hold. Increase speed only in small steps once each shot breaks cleanly and the sight picture stays steady. Watch for flinching, jerky releases, or fatigue creeping into the finger, and drop back to slower repetitions when accuracy slips. Speed that costs accuracy is not a gain.