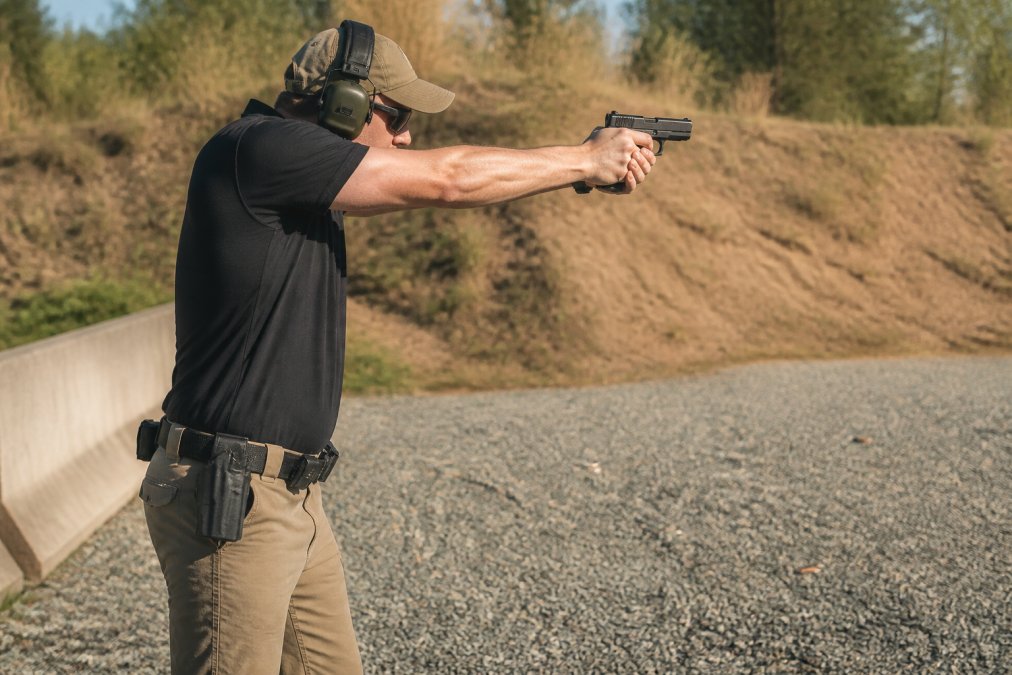
 how-to
Shooting Posture for Beginners: Why It Matters
Table of Contents
- Why Shooting Posture Matters More Than You Think
- The Fundamentals of Marksmanship Start With Your Feet
- Isosceles vs Weaver Stance: Which Is Better for Beginners?
- Recoil Management Techniques That Start With Posture
- Common Posture Mistakes Beginners Make (And Fixes)
- How to Build a Consistent Shooting Posture
- Build Your Shooting Foundation
- Frequently Asked Questions
Last Updated: September 5, 2026
Why Shooting Posture Matters More Than You Think
Most beginners assume accuracy comes from the hands or the eyes. In practice, the foundation of every accurate shot is the position of your entire body. Shooting posture is the alignment of your feet, hips, shoulders, and head that creates a stable platform for the firearm, and it determines how effectively you control recoil and acquire your next sight picture. The fastest way new shooters improve is by fixing their stance before touching their trigger finger.
The relationship between posture and accuracy is biomechanical. When your skeleton supports the firearm rather than your muscles straining to hold it, your natural point of aim stabilizes, reducing the micro-movements that destroy precision at distance. Many beginners chase expensive upgrades to their pistol grip or sights, yet ignore the fact that a shaky platform will undermine even the best equipment.
Below, we break down the fundamentals of marksmanship from the ground up, compare the two dominant stances, and give you a troubleshooting checklist for the most common mistakes.
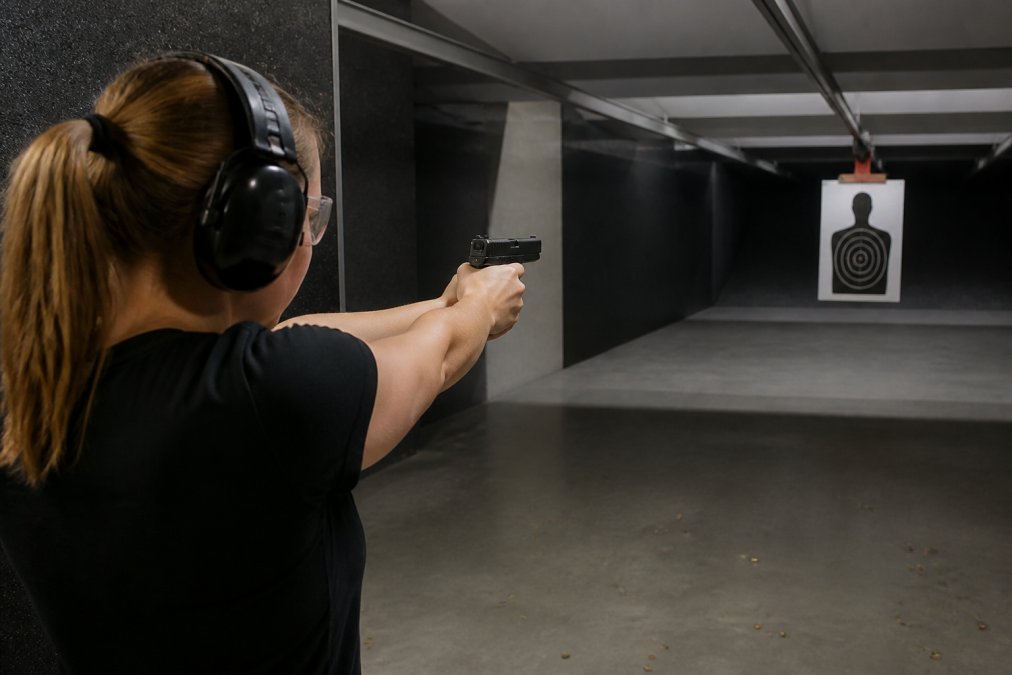
The Fundamentals of Marksmanship Start With Your Feet
Shooting posture begins with foot placement and weight distribution. Your feet should be roughly shoulder width apart, with your weight shifted slightly forward onto the balls of your feet. This athletic position keeps your center of gravity low and allows your body to absorb energy rather than resist it.
Your lead foot should point toward the target, while your rear foot sits at roughly a 45-degree angle for balance. A common mistake is standing square to the target with locked knees, which turns your body into a rigid structure that gets pushed backward with each shot.
A slight bend in the knees and a forward tilt of the hips engages your core muscles, connecting your lower body stability to your upper body control.
Isosceles vs Weaver Stance: Which Is Better for Beginners?
The two dominant schools of thought are the Isosceles and the Weaver stance. For most beginners, the Isosceles stance is the better starting point because it is more intuitive and aligns with your body's natural biomechanics.
The Isosceles stance involves standing square to the target with both arms extended straight, feet shoulder width apart and parallel. The name comes from the triangle your arms and shoulders form when viewed from above. Because both arms push forward equally, the firearm sits directly in front of your nose, simplifying sight alignment. This stance is easy to learn and provides a solid, symmetrical platform for recoil management.
The Weaver stance is a more aggressive, bladed position. You stand with your support foot forward, your strong-side foot back, and you push forward with your strong arm while pulling back with your support arm. This isometric tension creates a rock-solid platform, but it requires more upper body strength and practice to master. Many shooters find it fatiguing, especially during long range sessions.
| Stance | Foot Position | Arm Action | Best For | Difficulty |
|---|---|---|---|---|
| Isosceles | Square, shoulder width | Both arms push forward | Beginners, quick target acquisition | Low |
| Weaver | Bladed, one foot back | Push-pull isometric tension | Shooters with upper body strength | Moderate to High |
For a beginner, master the Isosceles first. It builds confidence and establishes the fundamentals without the complexity of managing opposing muscle tension. You can experiment with the Weaver later once your grip and trigger control are consistent.
Recoil Management Techniques That Start With Posture
Recoil management techniques often focus on grip strength, but the most effective recoil mitigation begins with your stance. A proper shooting posture transforms your entire body into a shock absorber, distributing the energy of the shot through your skeletal structure rather than letting it all hit your wrists and elbows.
When the firearm fires, the muzzle rises and the gun pushes backward. A forward-leaning posture with a slight bend in the knees allows your body to rock slightly with the recoil and return to the same position naturally. If you stand upright with locked joints, the recoil travels up your arms and into your shoulders, causing the muzzle to flip more violently and slowing your follow-through.
The fighting stance, a variation of the Isosceles with a more pronounced forward lean, is often taught for defensive shooting because it prioritizes recoil control and rapid follow-up shots. The key is maintaining forward pressure with both arms, think of pushing the gun toward the target, not just holding it up. This active push creates the tension needed to keep the muzzle from climbing excessively.
Common Posture Mistakes Beginners Make (And Fixes)
Many shooters develop bad habits without realizing it, and these mistakes directly affect accuracy and consistency. The real value lies in using your target as a diagnostic tool, your shot placement is a direct report on what your posture is doing wrong. Here is a troubleshooting guide that connects what you see on the paper to what your body is doing.
Reading Your Target: A Posture Diagnostic
Hitting Low-Left (for right-handed shooters). This is the most common pattern for new shooters, and it is rarely a sight problem, it is almost always a flinch or a push. As the shot breaks, your body anticipates the recoil and your strong hand pushes the muzzle down and left. The root cause is often a stance that is too upright. Fix: Re-check your weight distribution. You should feel pressure on the balls of your feet, not your heels. Increase your forward lean from the ankles and ensure your shoulders are not creeping up toward your ears.
Hitting Low. If your shots group low but centered, your posture is likely collapsing. This happens when you bend at the waist or drop your head to meet the sights, shifting your center of gravity and changing the angle of your arms relative to the bore. Fix: Stand tall and bring the firearm up to your eye line. Your head should be upright, and your spine should be straight.
Hitting High. A high impact point often indicates you are leaning too far back, bracing against the shot. This defensive posture lifts the muzzle as the gun fires. Fix: Shift your weight forward, your nose should be over your toes. If you are right-handed and hitting high-right, you may also be over-driving the gun with your strong arm.
Hitting Right (for right-handed shooters). This is frequently a grip issue that stems from a weak support hand. If your support hand is not applying enough pressure, the recoil will torque the gun in your hand, causing the muzzle to rotate to the right. Fix: Revisit your grip. The support hand should be applying 60-70% of the total grip pressure, high on the grip with your thumbs pointing forward.
The Wall Drill: A Posture Audit
A great diagnostic tool is the wall drill. Stand about a foot from a wall and assume your shooting stance. If your strong-side elbow or knee touches the wall, your stance is too bladed or your feet are misaligned. Adjust until your body is square and your natural point of aim is directly at the center of the wall. This drill reveals asymmetries in your hips and shoulders, if you feel tension in your lower back, you are likely twisting your torso to compensate for a misaligned base.
The Flinch Test
To determine if your posture is causing a flinch, perform the ball-and-dummy drill. Have a friend load your magazine with a mix of live rounds and snap caps without telling you the order. As you fire, watch the muzzle. When you hit a snap cap, if the muzzle dips or jerks, you are anticipating recoil. A proper forward-leaning stance reduces the perceived threat of the recoil, which in turn reduces the flinch response.
Body Type and Posture Corrections
Your physical dimensions dictate how these corrections apply. A taller shooter with a high center of gravity needs a more pronounced forward lean to achieve the same recoil control as a shorter, stockier shooter. A shooter with limited shoulder mobility may find it painful to achieve a full Isosceles extension; in that case, a modified Weaver with a slight bend in the arms is a better choice. The key is to avoid forcing a posture your body cannot support, adjust the stance to fit your body, not the other way around.
How to Build a Consistent Shooting Posture
Consistency in shooting posture is what separates a good shot from a lucky one. Your stance must be repeatable every single time you raise the firearm. However, consistency does not mean rigidity, a static range stance is not the same as a dynamic shooting posture. If you plan to shoot in competition or carry for self-defense, your posture must adapt to movement and equipment.
The Static Setup Sequence
- Set your feet first. Plant your feet shoulder width apart, with your lead foot pointing at the target. This is your foundation.
- Establish your grip. Grip the firearm high on the backstrap with your strong hand, then wrap your support hand over it, thumbs forward.
- Raise the firearm. Bring the gun up to your eye line, keeping your head upright. Both arms should extend naturally toward the target.
- Lean and engage. Shift your weight forward onto the balls of your feet and engage your core. You should feel a slight tension in your calves and lower back.
- Verify your sight picture. Close your eyes, take a breath, and relax. Open your eyes. If your sights are not aligned with the target, adjust your feet rather than muscling the gun back on target. This is your natural point of aim.
This process should take two to three seconds to execute. With practice, it becomes automatic. But this sequence assumes you are starting from a low-ready position with your firearm already in hand, real-world shooting is rarely that static.
Dynamic Posture: Moving and Shooting
When you introduce movement, your posture must change. The biggest mistake beginners make is stopping their feet before they shoot, creating a 'settling' period where your body is still decelerating, which ruins your natural point of aim. Instead, practice the 'shoot-on-the-move' principle: your feet should be in constant, small, shuffling steps, and you should fire between steps, not after you have fully stopped. Your upper body posture remains the same, forward lean, arms extended, but your lower body is in a continuous athletic crouch. This is why the fighting stance, with its deeper knee bend and wider foot position, is preferred for dynamic shooting.
Equipment-Specific Posture Adjustments
Your equipment changes your posture more than you might think. Here are three common scenarios:
Holster Position. If you draw from a strong-side hip holster, your stance must accommodate the draw stroke. A square Isosceles stance can make it difficult to clear a holster that sits at your 3 o'clock position. Many competitive shooters use a slightly bladed stance at the start of a stage to facilitate the draw, then square up to the target as they present the firearm. Your posture is not a fixed pose; it is a sequence of positions that flow from the draw to the shot.
Optic Height. If you are shooting a pistol with a red dot sight, your head position will be different than with iron sights. A red dot requires a more upright head position to see the dot clearly through the window. If you drop your head to the slide as you would with irons, you will lose the dot. This means your stance may need to be slightly more upright to align your eye with the optic. Conversely, a low-mounted optic may require a slight chin tuck. The key is to mount the optic and then adjust your head and stance so that the dot appears naturally when you present the gun, not the other way around.
Support Hand Equipment. If you use a weapon-mounted light, the added weight forward changes the balance of the gun. This requires a firmer support hand grip and a slightly more pronounced forward lean to manage the extra mass during recoil. Your posture must compensate for the equipment, not the other way around.
The Dry-Fire Reset Drill
To build consistency across static and dynamic positions, practice this drill at home. Set up a target on a wall. Start in a low-ready position. On a command (or a timer), raise the gun, acquire your sight picture, and dry-fire. Then, without lowering the gun, take two small steps to your left, reset your feet, and dry-fire again. Repeat moving right. This drill forces you to maintain your upper body posture while your lower body moves. You will quickly learn how much your shoulders and head drift when you step, and you can correct it in real time.
Build Your Shooting Foundation
Your shooting posture is the foundation upon which every other skill is built. Sight alignment, trigger squeeze, and breath control all become significantly easier when your body is positioned correctly. The fundamentals of marksmanship are not about strength; they are about efficient biomechanics and repeatable form. As documented in USA Shooting's marksmanship training resources, consistent position and hold are the first pillars of competitive accuracy. Likewise, the National Shooting Sports Foundation's safety and training guidelines emphasize that a stable stance is critical for safe firearm handling, as it ensures you maintain control of the muzzle at all times. Instructors across the country, including those certified by the NRA's training division, will tell you the same thing: fix the posture first, and the groups will tighten.
Start with the Isosceles stance, lean forward, and keep your feet planted. Practice the setup drill until it feels unnatural to do anything else. Then, when you are at the range, your focus can shift from fighting the gun to calling your shots.
Frequently Asked Questions
What is the best shooting stance for a beginner?
Most instructors recommend starting with the Isosceles stance. It is simple to learn, naturally aligns your body with the target, and provides a solid, stable platform for managing recoil. Your feet are shoulder-width apart, and your arms are fully extended, creating a triangle with your body. Once you build consistency with Isosceles, you can try the Weaver stance to see which feels more natural.
How does body alignment affect recoil management?
Proper body alignment puts your skeleton behind the gun, not just your muscles. When your arms, shoulders, and spine are aligned correctly, the force of recoil travels straight back through your body and into your core, which your legs absorb. This prevents the muzzle from flipping up excessively and allows for faster, more accurate follow-up shots. A poor stance forces your muscles to fight the recoil, causing fatigue and inconsistency.
Why is a stable stance essential for firearm safety?
A stable stance keeps you in control of the firearm at all times. Losing your balance can cause you to unintentionally sweep the muzzle in an unsafe direction or cause a negligent discharge. A proper shooting posture with a firm grip ensures the gun is pointed only at your target and allows you to maintain that control during recoil and follow-through. Control is the first rule of safe gun handling.
Shooting posture takes time to build, but it is the highest-leverage skill a beginner can develop. At BULLETPROOF SPEED LOADERS, we build gear like the EZ-MAG pistol speed loader to reduce hand fatigue and keep your focus on your form, not your reloads. Get started with BULLETPROOF SPEED LOADERS and build a foundation that holds up under any conditions.
This article was written using GrandRanker
Frequently Asked Questions
Q: What is the best shooting stance for a beginner?
A: Most instructors recommend starting with the Isosceles stance. It is simple to learn, naturally aligns your body with the target, and provides a solid, stable platform for managing recoil. Your feet are shoulder-width apart, and your arms are fully extended, creating a triangle with your body. Once you build consistency with Isosceles, you can try the Weaver stance to see which feels more natural.
Q: How does body alignment affect recoil management?
A: Proper body alignment puts your skeleton behind the gun, not just your muscles. When your arms, shoulders, and spine are aligned correctly, the force of recoil travels straight back through your body and into your core, which your legs absorb. This prevents the muzzle from flipping up excessively and allows for faster, more accurate follow-up shots. A poor stance forces your muscles to fight the recoil, causing fatigue and inconsistency.
Q: Why is a stable stance essential for firearm safety?
A: A stable stance keeps you in control of the firearm at all times. Losing your balance can cause you to unintentionally sweep the muzzle in an unsafe direction or cause a negligent discharge. A proper shooting posture with a firm grip ensures the gun is pointed only at your target and allows you to maintain that control during recoil and follow-through. Control is the first rule of safe gun handling.